
Sedula at a Glance
- Boss type
- Clan Boss, Relic Boss
- Summons
- Crusher, Spitter and Slicer Tentacles, and a Standard Clam (Strangehold)
- The Ship
- Tentacles damage your Ship, and the run ends when it sinks
- Counters
- Immunity, all-out damage, AOE to clear the tentacles, fast Clam breaking, Titans saved for when Sedula emerges
- Never bring
- Tolerance gear — Sedula has no Corruptions — and a team that relies on Burn and Bleed
- Best Invokers
- Tier List of Best Invokers for Sedula
Sedula Element Schedule
Sedula's element changes every day at 00:00 UTC, the same on every difficulty. Her stats and skills stay the same whatever the element, so only your team's elemental match-up changes.
| Day | Element |
|---|---|
| Monday |  Water |
| Tuesday |  Fire |
| Wednesday |  Light |
| Thursday |  Earth |
| Friday |  Wind |
| Saturday |  Dark |
| Sunday |  Neutral |
Sedula Accuracy, Resistance, Tolerance Requirements
This table shows Sedula's own stats at every difficulty — how much Accuracy and Resistance the boss has — and, next to them, what your own Invokers need. Hit the ACC goal and every debuff you cast lands on Sedula; hit the RES goal and you resist everything Sedula throws back.
Sedula has no Corruptions, so Tolerance does nothing in this fight and the table leaves it out — don't bring Tolerance gear.
| Difficulty | Boss ACC | Boss RES | Your ACC goal | Your RES goal |
|---|---|---|---|---|
| Normal | 60 | 310 | 310 | 180 |
| Hard | 250 | 380 | 380 | 370 |
| Insane | 350 | 555 | 555 | 470 |
| Nightmare | 450 | 635 | 635 | 570 |
Sedula Overview
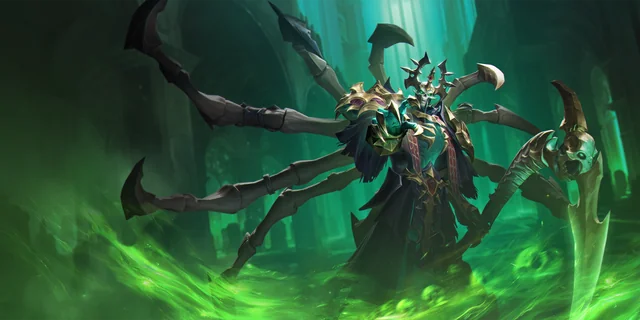
Rising from the ocean depths, Sedula surfaces to wreak havoc once again! To conquer this foe of epic proportions, you’ll need to work together with your entire Clan to send Sedula back down into the abyss.
Sedula’s not a Boss you can take down by yourself. Each Clan Member will deal damage to Sedula individually, with each attempt lowering Sedula’s total HP. Make her HP reach 0 (or infinity as it’s displayed in-game), and you’ve defeated her for the day! Everyone who took part (and dealt enough damage) will earn a Pearl, along with a Damage Chest for their efforts, with both containing randomized rewards. You also get up to 5 replays to deal the most damage to Sedula on the difficulty you selected – your first replay is free, but each subsequent try will cost you Gems.
The fight against Sedula is also different in that you cannot win in the traditional sense. Sedula will always eventually defeat you, either by destroying the Ship where this battle takes place, or by defeating your Invokers. So what’s your goal for this fight? Deal as much damage as you can, before your time runs out.
Luckily, there’s one major feature to the Sedula fight that means you can focus on maximizing your team’s damage. Sedula has no Corruptions for you to worry about. This means you don’t need to worry about Tolerances at all, and can build your team solely around offense.
You will, however, need to worry about Sedula’s Element. Sedula changes Element each day, meaning you’ll have to tailor your teams to match her current Element. The Elements do change on a set cycle, and one of them is also Neutral, meaning you don’t have to worry about clashing Elements on that day at all.
In order to even damage Sedula, you also need to first deal with her Tentacles. These three writhing limbs will deal damage to the Ship the longer you allow them to stick around (and also once they’re defeated), so all the more reason to put everything into dealing as much damage as possible!
When Sedula does appear, you only have a 60 second window to attack her before she disappears underneath the waves again, so go all out! Invoke your Titans, let fly with Ultimates, pile on as much pain as you can. Once that window closes, Sedula will sink beneath the sea and her Tentacles will reappear, starting the cycle once more.
Every time Sedula reappears, her ATK increases by 40%. So even if your team stays alive for multiple cycles, you will eventually be overwhelmed by Sedula’s awesome power.
Sedula’s Skills mostly focus on hampering your damage output, by either placing and spreading debuffs that lower your stats, or by draining your Mana so you cannot cast Ultimates or Invoke Titans. She also brings some nasty Burns, so watch out for clumping together as a team.
So don’t hold back! This is a sprint, not a marathon. Come out swinging with high damage Invokers, deal as much damage to Sedula as early as you can, before she manages to overpower you or destroy your Ship. And remember – you are not alone here! Coordinate with your Clan to find the ultimate strategy.
DO
✓ Focus on all-out damage!
✓ Bring Immunity to stop Sedula’s debuff spreads
✓ Keep an eye on the Ship’s health bar. That’s your ticking clock
✓ Save your Titans for when Sedula appears – that’s your damage window
DON'T
✕ Bring Tolerance Gear. Sedula has no Corruptions!
✕ Dilly-dally. Take out the Tentacles quickly!
✕ Forget the Clam! Destroy it ASAP when Sedula uses her Skill 2
✕ Rely solely on Bleed and Burn. Sedula takes reduced damage from these debuffs
Sedula Skill Breakdown
Passive
Sedula submerges 60s after emerging from the depths.
Sedula gains +40% ATK every time she reemerges.
Sedula takes 70% less damage from [Burn] and [Bleed] debuffs.
- TIP #1: Much like the Ship eventually being destroyed, Sedula’s ever-increasing ATK will overpower you, given enough time. Don’t waste time – deal damage early!
- TIP #2: While Bleed and Burn are useful in this battle, given Sedula’s gargantuan HP, don’t rely on them as your main source of damage. Use your Titans!
- TIP #3: Similar to Sorgott, Mindworm won’t do anything to Sedula. You can’t get around her timer that easily!
Combo Attack #1
Attacks 1 enemy. Casts a [50% ACC Down] debuff on the target, lasting 10s.
Combo Attack #2
Attacks the furthest Support Invoker in a 12m radius. Decreases the target’s Ultimate Mana by 20%.
- TIP #1: Your Support is the one losing mana here. Don’t let them drift away from the rest of the team.
Combo Attack #3
Attacks all enemies on the Ship. Casts a [4% Burn] debuff on the targets. The [Burn] debuff ticks 2 times every 10s. Each tick damages the target by 4% of their MAX HP.
Combo Attack #4
Attacks all enemies on the Ship. Decreases each target’s Ultimate Mana by 15%. Decreases the team’s Titan Mana by 200 for each target hit.
- TIP #1: Bring Evasion! While none of these Combo Attacks are devastating on their own, having them constantly chip away at your Titan and Ultimate Mana can reduce your overall offense. With Evasion, you can dodge them and their effects.
Skill 1 – Tyrant Fists
Attacks 1 enemy 2 times, dealing N damage per hit. Each hit transfers random debuffs to the target, then extends their duration by 10s. Then, casts a [4% Burn] debuff on the target. The [Burn] debuff ticks 2 times every 10s. Each tick damages the target by 4% of their MAX HP.
The debuffs cannot be resisted.
- TIP #1: While the debuffs Sedula transfers cannot be resisted, they can be blocked with Immunity. She can transfer a total of 6 debuffs with the two hits of Tyrant Fists, so build as many Immunity stacks as you can.
Skill 2 – Shell Siren
Summons a Standard Clam that targets a random enemy, enchanting them endlessly. The Standard Clam will damage the target by 5% of their MAX HP every second as true damage, until either the target or the Clam is dead.
Enchanted Invokers are stunned. The enchantment stun cannot be resisted or removed.
- TIP #1: As soon as that Clam appears, destroy it immediately! In the chaos of this battle, it’s easy to focus all your attention on Sedula, and then not notice that your all-important reviver has been killed by a giant bivalve.
- TIP #2: Don’t waste important debuff removal Skills on trying to stop the Clam’s enchantment. You can only remove it by destroying the Clam.
Skill 3 – Scream Typhoon
Attacks all enemies on the Ship 2 times, dealing N damage per hit. Each hit steals 2 random buffs from the target.
- TIP #1: There’s no way to avoid this screen-filling scream, so all you can do is ensure your RES is high enough to resist the debuff steal.
Skill 4 – Tentacle Rave
Attacks 1 enemy 2 times, dealing N damage. The first hit casts a [25% Weaken] debuff on the target, lasting 15s. The second spreads all debuffs on the target to all of the target’s allies within a 15m radius.
Then, attacks all enemies except the initial target, dealing N damage per hit. Casts a [50% DEF Down] debuff and a [50% ATK Down] debuff on the targets, each lasting 15s.
- TIP #1: Ensure you have as few debuffs on your team as possible when Sedula winds up for this attack. If she targets the same Invoker that’s just been hit by Tyrant Fists, she could be spreading 7 debuffs to your entire team!
- TIP #2: If it isn’t already clear, Immunity is a huge boon in this fight, exactly for countering these debuff spread effects.
TENTACLES
Sedula’s Tentacles burst through the Ship at the start of the fight, and must be defeated before you can deal damage to Sedula. There are three kinds: the Crusher, the Spitter and the Slicer.
Every Tentacle damages the Ship by 2% of its MAX HP every 10s while alive, and by 4% of its MAX HP when killed. Every living Tentacle also keeps stacking a negative effect on your team: the Crusher slows your Skill recovery, the Spitter slows your Combo Attacks, and the Slicer makes your Invokers take more damage.
- TIP #1: Slaying a Tentacle damages the Ship by 4% of its HP at once, but a Tentacle left alive deals 2% of the Ship’s HP as damage every 10 seconds. Kill them early.
- TIP #2: Like with Sedula, you can’t stop the Tentacles dealing damage to the Ship by using Mindworm. They will always deal damage to the Ship when they’re defeated, so focus more on taking them down ASAP.
CRUSHER TENTACLE – Skills
Skill 1
Attacks all enemies in a 15x25m zone in front of the Crusher Tentacle, dealing N damage per hit. Casts a [Stun] debuff on the targets, lasting 8s.
Instantly resets the cooldown of this Skill if there are no enemies within a 4m radius when attacking.
- TIP #1: This giant swing can stretch the entire width of the Ship, so be ready to dodge out of the way.
- TIP #2: But don’t move too far away! The Crusher Tentacle will keep flailing around if there are no enemies in its immediate vicinity, so sidestep out of the way of this attack, and then deal the finishing blow.
SPITTER TENTACLE – Skills
Skill 1
Attacks all enemies on the Ship, dealing N damage per hit. Casts a [50% ATK Down] debuff on the targets, lasting 15s.
Instantly resets the cooldown of this Skill if there are no enemies within a 4m radius when attacking.
Combo Attack 1
Attacks 1 enemy, dealing N damage. Infinite range.
- TIP #1: Out of all of Sedula’s Tentacles, dispatch this one first. A team-wide ATK Down application is irritating enough normally, let alone in a Boss fight where every bit of damage counts.
SLICER TENTACLE – Skills
Skill 1
Attacks 1 enemy, dealing N damage. Casts a [4% Bleed] debuff on the target. The [Bleed] debuff ticks 2 times every 10s. Each tick damages the target by 4% of their MAX HP.
Combo Attack 1
Attacks all enemies in a 5m radius, dealing N damage per hit.
- TIP #1: This is the Tentacle you can take out last. Its limited range means as long as you stay out of its effective range, it can’t really hurt you. The only downside to this – its Passive will tick up in the background.
STANDARD CLAM – Skills
Skill 1
Enchants 1 enemy. While enchanted, the target will be stunned and lose 5% of their MAX HP every 1s.
Enchantment cannot be resisted or blocked, and will not end until the Standard Clam is destroyed.
- TIP #1: The Clam’s enchantment only stops once it’s destroyed. Get rid of it quick!
Sedula Strategy
If it isn’t clear already, this fight is about pushing your damage output as high as it can go. The Ship will always be destroyed after a certain number of cycles, and Sedula will eventually have so much ATK that she’ll be able to one-shot your entire team. So frontload your damage at the beginning of the fight, as you’re going to spend the later cycles trying to heal up from Sedula’s onslaught.
While it may be tempting to focus on Invokers who deal big single-target damage, make sure you have at least one AoE attacker to deal with the Tentacles when they spawn. If you manage to kill them quickly enough, you can limit their damage output to the Ship to the single chunk of damage that they do whenever a Tentacle is defeated.
Once Sedula appears, then it’s party time. You’ve got a whole 60 seconds to unleash everything you have on the Abyssal Tyrant, before she disappears under the sea and her Tentacles reappear. On each subsequent reappearance, her ATK will increase by an additional 40% – so this first appearance is crucial for dealing the bulk of your damage.
In terms of actual strategy for dealing with Sedula, there aren’t any major mechanics to grapple with like other Bosses. Her Skills are quite straightforward – with them either placing debuffs to lower your offense, spreading debuffs from herself to your Invokers, or draining your Mana so you can’t cast Ultimates or Invoke Titans.
As a result, how you tackle this fight is really up to you! As Sedula does rely heavily on stat-lowering debuffs and Burn to deal the majority of her damage, Immunity is an absolute must-have, along with someone who can cleanse debuffs quickly.
While Sedula’s rampaging on-screen, the only other thing to really watch out for is the giant Clam she summons with her Skill 2, Shell Siren. This pesky mollusc will stun a random Invoker completely, slowly draining their HP until they die, or the Clam is destroyed. Don’t waste your debuff removal on trying to remove this enchantment – it can only be dealt with by destroying the Clam.
Given Sedula’s giant HP pool, debuffs like Bleed and Burn are very useful, but be aware that she does take 70% less damage from these debuffs compared to other Bosses. Again, Bleed and Burn will still inflict a decent chunk of damage, but these debuffs should be considered a nice addition to your damage output, rather than its main source.
So go wild – experiment with your fellow Clanmates to find the weirdest and wildest strategy to defeat Sedula! Her daily Element change means you will need to shake up your teams to utilize Element Advantage, so see which Invoker combo works best. You also get a free re-attempt on Sedula, no matter which difficulty you pick, so you always have at least one more throw of the dice, should your first fight of the day be an absolute disaster.
Good luck out on the seas – we’ll be rooting for you!
Sedula Difficulties
Sedula has four difficulties: Normal, Hard, Insane and Nightmare. Once your Clan defeats a difficulty, the next one unlocks at the next 00:00 UTC, and every difficulty you have unlocked stays open. You can open a locked difficulty to look at its rewards, strategy and top contributors before you can fight it.
| Sedula | Normal | Hard | Insane | Nightmare |
|---|---|---|---|---|
| HP | 150M | 750M | 1.5B | 3B |
| ATK | 1,250 | 2,750 | 3,750 | 4,500 |
| DEF | 3,000 | 4,000 | 4,500 | 6,000 |
| ACC | 60 | 250 | 350 | 450 |
| RES | 310 | 380 | 555 | 635 |
| Minion HP | Normal | Hard | Insane | Nightmare |
|---|---|---|---|---|
| Crusher Tentacle | 80,000 | 125,000 | 150,000 | 250,000 |
| Spitter and Slicer Tentacles | 50,000 | 80,000 | 110,000 | 140,000 |
| Standard Clam | 50,000 | 125,000 | 150,000 | 200,000 |
Sedula Rewards
Keys and Replays
Each day, you get one Abyssal Key to fight Sedula, refilled at 00:00 UTC. Once you have used it, you can replay a difficulty you have already started that day: the first replay is free, then 100, 200, 300 and 400 Gems, for up to five replays a day across all difficulties. Only your best run of the day counts.
Spellwall Relic Set
Spellwall Relics drop only from Damage Chests, earned based on how much damage you dealt to Sedula personally.
- 3 pieces: for the first 12 seconds of the battle, blocks the first two debuffs and the first two control effects aimed at the Invoker wearing it.
- 5 pieces: +10% HP, +10% ATK and +10% DEF.
Sedula Damage Chest Rewards
Your best single run of the day on a difficulty is measured against four damage milestones, and you get a Damage Chest based on the highest difficulty you cleared. Every chest holds two Spellwall Relics, a Playbook, a Codex and one bonus reward. The percentages are the game's own odds for each roll.
| Reward |  Chest I500K damage |  Chest II1M damage |  Chest III2.5M damage |  Chest IV5M damage |
|---|---|---|---|---|
| Spellwall Relics ×2 | ||||
| Rank | 5★ 90%6★ 10% | 5★ 90%6★ 10% | 5★ 89%6★ 11% | 5★ 88%6★ 12% |
| Rarity | Rare 60%Epic 30%Legendary 10% | Rare 60%Epic 30%Legendary 10% | Rare 60%Epic 30%Legendary 10% | Rare 60%Epic 30%Legendary 10% |
| Playbook – 1 of | ||||
 Standard Playbook | 36% | 36% | 36% | 36% |
 Heroic Playbook | 32% | 32% | 32% | 32% |
 Historic Playbook | 32% | 32% | 32% | 32% |
| Codex – 1 of | ||||
 Rare Codex | 66.7% | 63.36% | 56.64% | 53.3% |
 Epic Codex | 30% | 33.33% | 36.66% | 40% |
 Legendary Codex | 3.3% | 3.3% | 6.69% | 6.7% |
| Bonus Reward – 1 of | ||||
 Destiny Star | 10% | 13.33% | 16.67% | 20% |
 Divine Star | 3.33% | 3.33% | 3.33% | 3.33% |
 Radiant Star | 6.67% | 6.67% | 6.67% | 6.67% |
 3★ Echo | 16.67% | 16.67% | 16.67% | 16.67% |
 4★ Echo | 6.67% | 10% | 10% | 13.33% |
 5★ Echo | 3.33% | 3.33% | 3.33% | 3.33% |
 Memorium | ×1,00026.67% | ×1,20023.33% | ×1,30020% | ×1,40016.67% |
 Multi-Battle Tokens | ×4026.67% | ×5023.33% | ×6023.33% | ×7520% |
| Reward |  Chest I4M damage |  Chest II7M damage |  Chest III10M damage |  Chest IV15M damage |
|---|---|---|---|---|
| Spellwall Relics ×2 | ||||
| Rank | 5★ 89%6★ 11% | 5★ 89%6★ 11% | 5★ 88%6★ 12% | 5★ 87%6★ 13% |
| Rarity | Rare 60%Epic 30%Legendary 10% | Rare 60%Epic 30%Legendary 10% | Rare 60%Epic 30%Legendary 10% | Rare 60%Epic 30%Legendary 10% |
| Playbook – 1 of | ||||
| Standard Playbook | ×236% | ×236% | ×236% | ×236% |
| Heroic Playbook | 32% | 32% | 32% | 32% |
| Historic Playbook | 32% | 32% | 32% | 32% |
| Codex – 1 of | ||||
| Rare Codex | 50% | 46.65% | 43.3% | 40% |
| Epic Codex | 43.3% | 46.65% | 46.7% | 50% |
| Legendary Codex | 6.7% | 6.69% | 10% | 10% |
| Bonus Reward – 1 of | ||||
| Destiny Star | 20% | 23.33% | 26.67% | 26.67% |
| Divine Star | 3.33% | 3.33% | 3.33% | 3.33% |
| Radiant Star | 6.67% | 6.67% | 10% | 10% |
| 3★ Echo | 10% | 13.33% | 10% | 10% |
| 4★ Echo | 10% | 10% | 10% | 10% |
| 5★ Echo | 3.33% | 3.33% | 3.33% | 3.33% |
| Memorium | ×1,50023.33% | ×1,50020% | ×1,60016.67% | ×1,65016.67% |
| Multi-Battle Tokens | ×8023.33% | ×8520% | ×9020% | ×9020% |
| Reward |  Chest I15M damage |  Chest II25M damage |  Chest III30M damage |  Chest IV40M damage |
|---|---|---|---|---|
| Spellwall Relics ×2 | ||||
| Rank | 5★ 88%6★ 12% | 5★ 88%6★ 12% | 5★ 87%6★ 13% | 5★ 86%6★ 14% |
| Rarity | Rare 60%Epic 30%Legendary 10% | Rare 60%Epic 30%Legendary 10% | Rare 60%Epic 30%Legendary 10% | Rare 60%Epic 30%Legendary 10% |
| Playbook – 1 of | ||||
| Standard Playbook | ×236% | ×236% | ×236% | ×236% |
| Heroic Playbook | ×232% | ×232% | ×232% | ×232% |
| Historic Playbook | 32% | 32% | 32% | 32% |
| Codex – 1 of | ||||
| Rare Codex | 40% | 36.7% | 33.3% | 30% |
| Epic Codex | 50% | 50% | 50% | 50% |
| Legendary Codex | 10% | 13.3% | 16.7% | 20% |
| Bonus Reward – 1 of | ||||
| Destiny Star | 26.67% | 26.67% | 26.67% | 33.33% |
| Divine Star | 3.33% | 3.33% | 3.33% | 3.33% |
| Radiant Star | 6.67% | 6.67% | 10% | 10% |
| 3★ Echo | 13.33% | 10% | 13.33% | 6.67% |
| 4★ Echo | 6.67% | 10% | 10% | 13.33% |
| 5★ Echo | 3.33% | 3.33% | 3.33% | 3.33% |
| Memorium | ×1,70020% | ×1,70020% | ×1,80016.67% | ×2,00013.33% |
| Multi-Battle Tokens | ×9020% | ×10020% | ×12016.67% | ×12016.67% |
| Reward |  Chest I20M damage |  Chest II35M damage |  Chest III50M damage |  Chest IV70M damage |
|---|---|---|---|---|
| Spellwall Relics ×2 | ||||
| Rank | 5★ 85%6★ 15% | 5★ 85%6★ 15% | 5★ 80%6★ 20% | 5★ 75%6★ 25% |
| Rarity | Rare 60%Epic 30%Legendary 10% | Rare 60%Epic 30%Legendary 10% | Rare 60%Epic 30%Legendary 10% | Rare 60%Epic 30%Legendary 10% |
| Playbook – 1 of | ||||
| Standard Playbook | ×236% | ×236% | ×236% | ×236% |
| Heroic Playbook | ×232% | ×232% | ×232% | ×232% |
| Historic Playbook | ×232% | ×232% | ×232% | ×232% |
| Codex – 1 of | ||||
| Rare Codex | 23.3% | 16.7% | 10% | — |
| Epic Codex | 50% | 50% | 50% | 50% |
| Legendary Codex | 26.7% | 33.3% | 40% | 50% |
| Bonus Reward – 1 of | ||||
| Destiny Star | 33.33% | 33.33% | 33.33% | 33.33% |
| Divine Star | 3.33% | 3.33% | 6.67% | 10% |
| Radiant Star | 10% | 10% | 13.33% | 16.67% |
| 4★ Echo | 16.67% | 16.67% | 10% | 16.67% |
| 5★ Echo | 3.33% | 3.33% | 3.33% | 3.33% |
| Memorium | ×2,00016.67% | ×2,20016.67% | ×2,40016.67% | ×4,00010% |
| Multi-Battle Tokens | ×12016.67% | ×12016.67% | ×12016.67% | ×20010% |
Sedula Pearl Rewards
When your Clan's defeats Sedula on a specific difficulty, every member who reached the Damage Chest I milestone on that earns the Pearl. It awards you a Prism and one bonus reward, and you claim it the next day, separately from your Damage Chest.
| Reward |  Normal150M Clan damage |  Hard750M Clan damage |  Insane1.5B Clan damage |  Nightmare3B Clan damage |
|---|---|---|---|---|
| Prism – 1 of | ||||
 Rare Prism | 53.35% | 43.3% | 33.3% | 26.67% |
 Epic Prism | 33.33% | 40% | 46.7% | 46.65% |
 Legendary Prism | 13.31% | 16.7% | 20% | 26.67% |
| Bonus Reward – 1 of | ||||
 Dream Orb | 10% | 16.67% | 16.67% | 16.67% |
 Wonder Orb | 6.67% | 13.33% | 16.67% | 26.66% |
 Miracle Orb | 3.33% | 3.33% | 6.67% | 6.67% |
 3★ Dragonsoul | 16.67% | 13.33% | 10% | 6.67% |
 4★ Dragonsoul | 6.67% | 10% | 13.33% | 16.67% |
 5★ Dragonsoul | 3.33% | 3.33% | 3.33% | 6.67% |
| Memorium | ×75026.67% | ×1,00020% | ×1,20016.67% | ×2,00010% |
 Titan Spark | ×25026.67% | ×35020% | ×45016.67% | ×80010% |
Sedula - Boss Teaser Video
Invokers That Help Beat Sedula
Sedula has no Corruptions, so what a roster can answer here is Invokers who bring Immunity. Each list below is every Invoker in the game who has it.
Invokers with Immunity
Beyond Tolerance, Sedula asks for Immunity. These are the Invokers who bring it.



 Crestelle Moonveil


 Roxxi & Gumm


 Virtus the Heavensent

 Kryxa the Giantfeller
 Skoloss the Tomb Baron
 Tuskax the Rampage
 Luxare the Prismatic

 Custodian Plumia


 Belmor
Sedula Tier List
The Invokers ranked for Sedula from S+ to E by the developers' own ratings, with the top-rated Invokers who bring what this fight asks for.
Open the Official Sedula tier list
Open the Player Sedula Tier List
Sedula FAQ
How do you beat Sedula in Invokers: Titan Legacy?
Deal as much damage as you can before the Ship sinks. Kill her Tentacles early, destroy the Standard Clam as soon as it appears, keep Immunity on your team against her debuff spreads, and save your Titans for when she emerges from the depths.
Does Sedula have Corruptions?
No. Sedula has no Corruptions, so Tolerance Gear does nothing in this fight. Build your team for damage instead.
How do you free an Invoker from the Standard Clam?
Destroy the Standard Clam. Its Stun cannot be resisted, blocked or removed, and it drains 5% of the target's MAX HP every second until either the Clam or the target dies.
How much damage do you need for each Damage Chest?
On Normal: 500K, 1M, 2.5M and 5M for Damage Chests I to IV. Hard asks 4M, 7M, 10M and 15M, Insane 15M, 25M, 30M and 40M, and Nightmare 20M, 35M, 50M and 70M. Only your best run of the day counts.
What does Sedula drop?
Every Damage Chest holds two Spellwall Relics at rank 5 or 6, a Playbook, a Codex and one extra reward. When your Clan defeats Sedula on a difficulty for the day, the Pearl will award you a Prism and one extra reward.
How many times can you fight Sedula a day?
Your Abyssal Key gives you one fight a day. After that, a difficulty you started today can be replayed up to five times: the first replay is free, then 100, 200, 300 and 400 Gems.
Which Invokers and Titans are good against Sedula?
Sedula asks for Tolerance against , and for Invokers who bring Immunity. Tolerance is an Invoker stat — a Titan does not have one, so choose your Titan to suit the Invokers you are taking rather than the boss. Every Invoker in the game who qualifies is listed on this page: Invokers That Help Beat Sedula